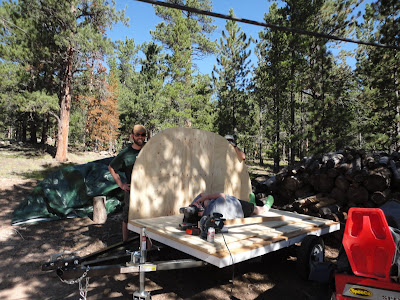
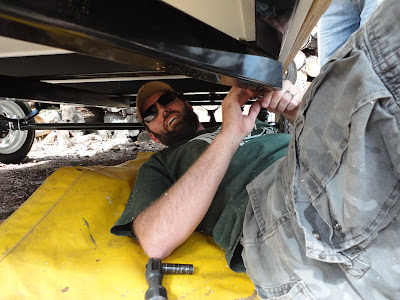
A key addition to the camper at this step was the addition of a tongue jack. Previously, we had been using a log to support the neck of the trailer, but with the addition of a good bit of wood and weight, this was getting to be an unreliable arrangement. I picked up a cheap, heavy-duty bolt-on boat trailer jack with dual wheels, crank up/down, and pivot to fold out of the way from Harbor Freight. We decided to mount it on the center yolk support which is a tight fit. I may decide to move it to the outside rail later, but for now there it stays.
In my last post I mentioned that one more bolt-on was needed to have basic trailer base built. Since the deck is over-sized to accommodate a larger mattress inside, a PVC spacer is needed on the sides of the trailer to create a flush surface to bolt the walls of the cabin to. The advantage of PVC is again its durability and rot-free nature. Since the fenders supports will need to bolt through this trim, holes we drilled prior to mounting.
Using the same fastening technique as on the deck, self-tap screws were used to fasten a 3 1/2" piece of PVC trim to each side of the trailer under the deck overhang (look closely in the pic to see the white PVC).
At this point, the trailer was ready for wall construction. Working from a variety of existing camper designs available online, a number of dimension scenarios were considered using graph paper as an transparent overlay (thanks to my dad for his drafting skills here).
The primary considerations at this step are to finalize the overall height, the radii for the front and rear curves, and placement of the doors in the side. After considering several options, we arrived at a 53" height that includes 3" overhang over the sides, 2" roof thickness, a 6" thick mattress, and 2" interior drop on the roof fan that will be installed later. This still allows for me (6'1") to reach over my head to change clothes while sitting on the mattress. In terms of the radii of the curves, we arrive at a 30" radius on the front, and 54" radius on the back. This seemed to be a good balance of curves with something that didn't look too egg shaped. Lastly, the door placement was decided to be as far to the rear as possible without encroaching on the wheels/fenders. The goal here was to be able to get in/out of the camper by sitting and turning, without having to shimmy forward/backward from a laying position.
With those dimensions in mind, the next step was to create the walls. The 53" height, combined with 101 1/2" length meant the walls would need to be stretched from three pieces of plywood. To accomplish this, each piece of plywood was cut to a 53" height. Based on the positioning of the door, we decide the piece would be unequal with the forward piece of plywood narrow, the middle the widest to accommodate the door opening, and the back piece covering the balance of the length. The plywood was joined at the ends using biscuits and wood glue, with a 1' wide backing of 1/4" plywood fastened with construction cement and air-driven brads.
Having a specialty biscuit hole driller helps!
The 1/4" backing "panels".
After assembling the wall pieces and allowing time for the glue to set up, the next step was to cut the walls to the profile drawn out on the "blueprint". To accomplish this my dad came up with a great radius cutting tool. Using a scrap strip of plywood, he measured the the distance of each curve radius from the end of the strip and drilled a hole. He also then drilled a larger hole at the other end, and bolted his router to this end, allowing for the other end of the board to be loosely screwed to the wall being cut at the center point of the curve's radius.
The radius tool with router installed on one end.
The radius tool making a cut.
A cut made by the router.
With the front and rear radii cut in the sides, the next step was to cut the door opening. As mentioned, the door opening has been set as far back toward the rear of the trailer as possible to make ingress/egress as easy as possible. The other locating dimension for the door was to raise the door opening 3" above the deck height to allow for some mattress thickness to extend above the opening and not create an lip to get hung up on when getting in and out of the camper. Otherwise, the door opening is based on the dimensions of the ARE truck cap walk through door dimensions of 22" x 39" I purchased, which I'll explain in the next post.
Using a circular saw with a plunge cut for the straight edges and and jigsaw for the rounded corners, the door openings were cut in several passes. The last part of the wall construction for now was to reinforce the door opening with a 3" trim backing around the inside of the door opening. This was done using scrap plywood, fastened with brad and construction cement.
That bring us to the part of the process that provided the title for this post. In the middle of this build day, Diane shared her fear that sleeping in this camper would be like sleeping in a coffin, due to its small size. Until now, there wasn't really a frame of reference for how large or small the camper would be. Based on an initial look at the uncut walls, it looked like the camper would be small, but big enough. When the walls were trimmed down to size, there was somewhat of a shared 'holy crap' reaction at how small the thing might be. This picture captures Diane's concern!!!
And the coffin pose!!!
Fortunately, the permanent installation of the walls proved to somehow make the camper feel larger than it just had. Here you can see how much more at ease Diane is about it. It was at this point that she commented how the camper would be an oversized coffin instead or a regular coffin!
It turned out the wall mounting was relatively straightforward. I picked up some 5/16" x 2 1/2" machine bolts with taper heads and lock nuts. We drilled eight holes for each wall, going through the plywood, PVC, and c-channel frame of the trailer, backed with a lock nut and a flat washer. The lock nuts pull the head of the bolt flush with the plywood surface so that the aluminum skin would have a smooth backing.
Me posing while bolting the walls on.
The last step at this point was to begin joining the walls and creating a roof surface by installing the cross-member (stringers?). I had considered using 2"x2" pine for this, but my dad pointed that the weakness and likelihood of warping of this wood product. Instead, he suggested we use glued and nailed strips of plywood, so we did. Right away I could tell these "boards" had a sturdier feeling to them. Using another of his handy tools, my dad drilled end-grain fastening holes to tie the cross members to the walls.
We decided on 10" spacing for these. We got a few installed before we ran out of gas and time.
Speaking of which, I'm about out of both for this post. Next time I'll get into more detail about the stringers, door installation, roofing, and whatever we decide to do next. Later...


