Next up, we needed to cut the door loose. To do this, we used a Dremel with a cutting guide to measure an inset from each outside edge.
Starting in the corner with a plunge cut, it was simply a matter of walking the Dremel around the edge of the trailer, following the pre-measured gap between the on-trailer framing and the door framing.
and
and voila:
the door is loose:
With the door off, the router can be used to clean up both the door opening, and the door itself.
and
Next up is to begin to cut out the door openings for the cabinets. Taking some measurements and establishing the size of the cabinet opening, we could pencil the desired door openings on the cabinet face.
In this case, since the cabinets faces are enclosed inside the trailer rear opening, there are no edges to use as guides. Instead, we used scrap plywood temporarily screwed to the cabinet face to act as a guide.Next up is to begin to cut out the door openings for the cabinets. Taking some measurements and establishing the size of the cabinet opening, we could pencil the desired door openings on the cabinet face.
and
The end result is a nice pair of cabinet door openings. In the case of the top main rear door, we were sure to leave a center face gap wide enough to accommodate a standard two plug AC wall outlet and an LED light fixture...later.
In total, 10 door openings will need to be cut: two above the countertop in the rear, two below, three overhead inside the trailer, and two short, wide openings for the raceway below the three overhead. Kinda like this (on the inside):
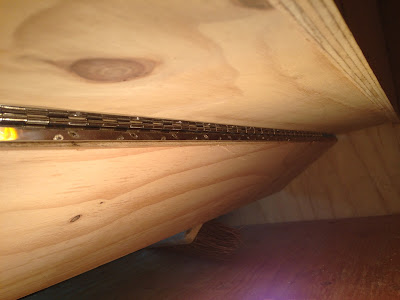
Again, more to follow. Next up, the foot-end hinged mattress enclosure needs to be installed. If you recall from an earlier post, with the allowable space, the 80" queen size mattress length protrudes several inches into the cabinet space under the countertop. Stepping out and around the mattress end, this enclosure needs to be hinged to allow for install and removal of the mattress inside through the rear of the trailer (since there will be no other opening nearly large enough to do this). Using a 48" piano hinge from Home Depot face mounted on the ends of the moving and fixed panels, installations is clean and easy.
and
and
When complete, the hinged panel will latch to the floor in the vertical position, enclosing the interior cabin space. This panel will move in concert with the hinged rear lower cabinet face to allow for removal of the mattress (say what? details to follow).
The last item this time around is to cut the roof vent opening. In this case, we needed to measure, cut, and add two lengthwise 2"x2" braces to connect the two existing roof stringers. Again using the Dremel, but this time around with an edge following bit and after starting with a plunge cut, the opening was smooth and easy to cut.
A few screws on each side to anchor the skin to the new braces, and the opening is done and ready for final fan installation.
and
Again, details to follow. That's it for now, and until next time...


No comments:
Post a Comment