To mount some of the LED fixtures at downward angles, my dad fabricated wedge blocks from CPVC to serve as an angled base:
Mounted, they make for a clean looking fixture:
Coupled with another light, they provided pretty good kitchen lighting for the current draw:
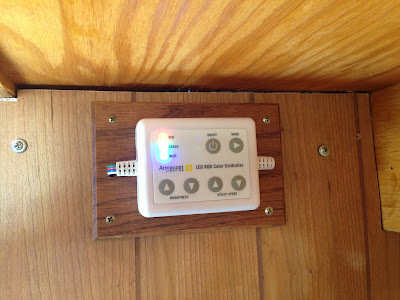
Moving from the LED fixtures to the strip lighting, if you recall from last time, I purchased an awesome 21 color LED strip light from Home Depot. Made by Armacost, this light features a wall mounted controller, preset modes, adjustable brightness, and an IR remote control. Splitting the strip in half (using a pair of scissors), fabricating a wiring extension from a pair of phone cords, and mounting using a pair of u-shaped clear plastic channels and 3M backing tape, the lights came out awesome:
To finish it off, my dad made a nice backing plate for the light controller:
Complementing the strip lights on the inside are a couple of swiveling wall reading lights from Camping World:
Shown in some of the pictures above, is the further finish of the paneling, using the Braden Cherry and lath screws from Home Depot. Also show is PVC quarter round molding to finish off the edges of the paneling. Finishing the paneling also included fitting paneling inside the cabinets, which proved a little trickier and more time consuming than expected:
Beyond paneling, work on the kitchen door also included installing gas struts and latch hardware. After some shopping contemplation, combined with brain wracking over installation, at set of RV Designer gas props from Camping World go on:
Also on the kitchen door, a locking T-handle latch and a pair of chain bolts go on, joined with wire rope and turnbuckles:
Strike plates will go on next to finish the door latches. Details in the next post.
Changing gears again, remember the wiring? In addition to the lighting, a couple of 12 volt outlets seemed a good idea- something handy to have. Combining outlets from Camping World with 110V-120V using a custom wall plate looks pretty good:
In the kitchen, two plates do the job:
With this wiring complete (along with an under cabinet light, some battery wiring, and ground wiring details to follow), the electric raceway and 12V block are looking full:


